Call us at +306983556478

How to Make a Burlap Bow the Secret, 6-Step Way
Burlap bows appear easy to make – and they are – assuming you know the technique most guides don’t mention.
If you’ve previously attempted tying burlap into a bow, only to end up with something bumpy and off-kilter, unlike the bows you find on Pinterest, you aren’t the only one. Burlap isn’t similar to satin or organza; it’s coarse, it has texture, and seems to have a will of its own. But that’s also what makes it look so good on a country-style wedding arrangement, a wreath, a church pew adornment, or a present.
The trick? You don’t actually tie it; you construct it.
After I understood this technique, my bows changed from embarrassing to something I was really pleased to display on a guest table. And if I could do it, I promise you can, too.
Here’s all you must know, and a few skilled tips for creating these in advance.
What You’ll Need
Before beginning, collect your materials. Nothing here is difficult to locate, and you likely have most of it already.
- Burlap ribbon – Wired burlap ribbon is best for novices. The wire maintains the loops’ form, so you aren’t battling the bow as you build it. A 2.5-inch width is the most adaptable for arrangements and wreaths. For chair ribbons or larger décor, increase to 4 inches.
- Floral wire or pipe cleaners – To secure the bow’s centre.
- Wire cutters or scissors – Either will do for burlap ribbon.
- Optional: Lace ribbon, string, or a burlap flower to place on top of the finished bow for more detail.
That’s all. No hot glue is required for this technique – good news for anyone (such as myself) who consistently burns their fingers.
There are many ways to create awesome burlap bows and this is one of them!
Step 1: Cut Your Ribbon Tails First
Before you start making loops, cut two lengths of ribbon for your bow’s tails. Every tail ought to be approximately 6 to 8 inches long, depending on how dramatic you want the completed result.
Put these to one side. You’ll attach them at the very end, which is a stage many guides combine with the looping – and that’s when things become confusing. Keeping them separate makes the entire process neater.
Pro tip: Should you want uneven tails for a more relaxed, rustic appearance, cut one tail a little longer than the other. It may seem wrong, but it looks wonderful in photos.
Step 2: Make Your First Loop
Hold the ribbon between your thumb and index finger, letting a short anchor tail of about 2 inches hang down. This anchor tail isn’t your bow tail – it’s only what you squeeze between your fingers as you construct.
With your other hand, bring the ribbon up and over to create your first loop. The loop ought to be approximately 4 to 5 inches long – about the size of your palm. Squeeze the base of the loop between your thumb and index finger, exactly where the ribbon crosses.
Don’t release it. From now on, your stronger hand is free to keep looping. Your weaker hand is merely going to hold on.
Step 3: Make a Loop on the Opposite Side
Bring the ribbon back in the reverse direction and form a matching loop on the other side. Squeeze this at the same central point.
You ought to now have two loops of about the same size – one on each side – and the ribbon crossing in the centre where you’re squeezing.
This is where burlap bows fail for most people. The loops move, the ribbon turns, and annoyance begins. The solution is simple: keep your squeeze tight. Do not attempt to adjust or fluff yet. Just build.
Step 4: Continue Making Loops
Do Steps 2 and 3 two more times, making a second group of loops over the first. You’re really building loops on top of each other, like a figure eight – and all held together by where you’ve been pinching.
When you’re done with this stage, you ought to have four to six loops in all – two or three on each side. If you want a very full bow, create three groups; if you want something less showy, or are using wide ribbon, two groups will do.
Regarding size: Bigger loops give a larger, more noticeable bow – good for wreaths or decorations on ceremony arches. Smaller loops are best for mason jar centrepieces, gift bags, or posies. There isn’t a bad choice, simply what looks in keeping with what you are decorating.
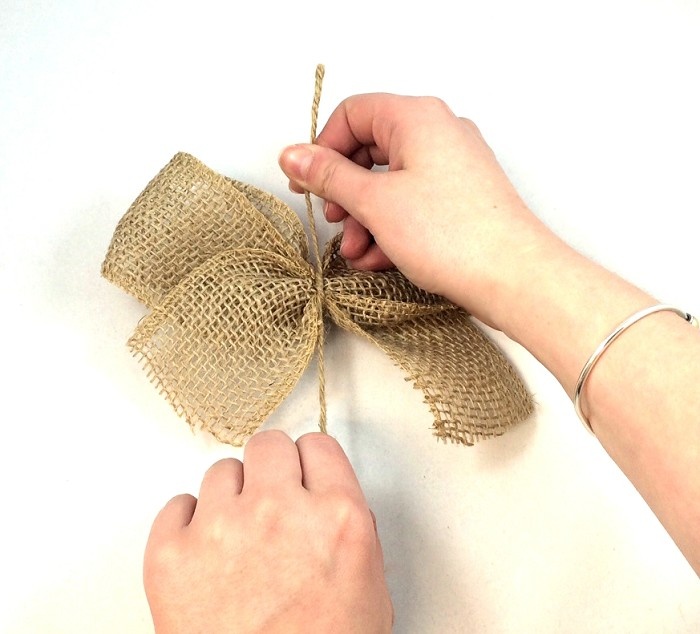
Step 5: Hold the Centre
This is the stage that will either succeed or fail.
Get a length of floral wire or a pipe cleaner and wind it firmly around the middle of all your loops – exactly where you’ve been squeezing. Turn the wire at the back a couple of times until everything is tight and nothing shifts.
You can now let go. Breathe easily. The difficult part is finished.
Attach the tails you cut earlier by tucking them under the wire at the back, then twist it all together. If you want the tails to look neat, cut the ends at an angle or into an upside-down V. Both give a tidier, more deliberate appearance than a straight cut.
Step 6: Arrange and Shape
This is where it comes together.
Lightly draw each loop outwards and upwards, separating and shaping each one in turn. If you used wired ribbon, the loops will stay where you put them as you adjust. If you used plain burlap, go slowly and use your fingers to gently persuade each loop into position.
Don’t seek perfect evenness. Burlap bows should seem a little country-style, a little made by hand. That’s the point of them. If one loop is a bit bigger than another, that’s personality, not an error.
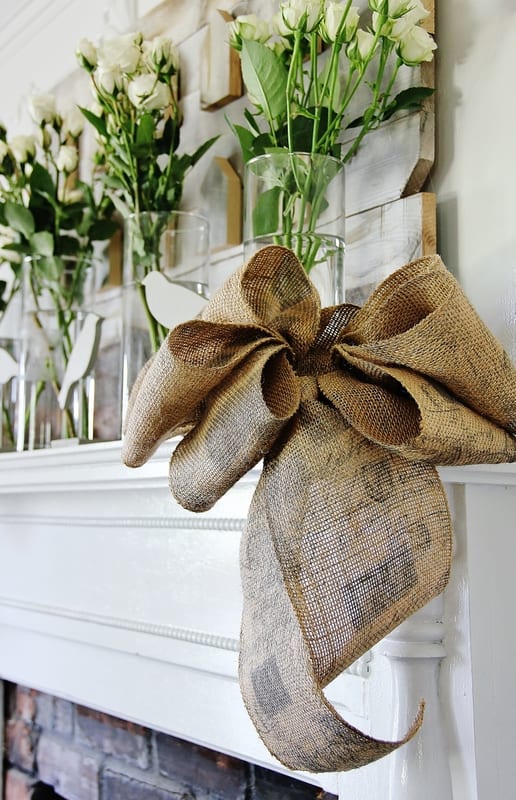
When you’re pleased with the shape, fix the bow to your centrepiece, wreath, chair ribbon, or wherever it’s going. You can use the wire tail at the back to wrap around a vase’s neck or a wreath’s base, or simply hot-melt glue the whole bow to your project.
Want to add a little extra? Put a piece of lace ribbon or a burlap rosette right in the centre before you glue it on. The difference of textures makes a simple bow go from pretty to really lovely. For instructions on making your own burlap rosettes, look at the burlap flower guides here.
TRIPLE LAYER BOW – Oh my God!!!!
Make Ahead Advice
The good news is: burlap bows are very good for making beforehand.
Once finished, keep bows loosely in a box – do not put anything heavy on top, or the loops will become flat.
They will hold their shape for several weeks, making them a good task for the month or two before your wedding.
If you’re making bows for a number of tables or lots of gifts, set up a line. Cut all your tails first, then make all the loops, then wire them all at once. You’ll soon find a speed, and the later bows will be a lot faster than the first few.
A Few Last Points
Burlap ribbon differs a lot by maker. Loosely woven burlap frays more at the edges, which gives a very natural, country look. Closely woven burlap has neater edges and a slightly more refined finish. Neither is wrong – it simply depends on the look you want.
And if your first bow doesn’t look like the picture you had in mind? Make another. By the third bow, most people have got the hang of it.
Once you’ve mastered the basic style, the world of burlap decoration opens to you. These bows look nice on mason jar centrepieces, wreath bases, pew cones, and even around a simple country wedding cake. The skills apply everywhere.
Now go and make something beautiful.
What are you making your burlap bows for? Leave a comment below – I’d like to hear what you are working on!
Until next time,
Stay safe,
Katerina